Showing posts with label Photoshop. Show all posts

Friday, March 16, 2012

Kulit Cantik dan Tanpa Cela?


Produk skin care yang satu ni dah lama ada kat pasaran. Memang tiptop dan dapat sambutan yang sangat menggalakkan. Dah ramai yang guna. So far memang ada perubahan!
Sangat disyorkan oleh pakar-pakar sedunia tau! Bagi sesiapa yang rasa nak putihkan muka, hilangkan segala jenis benda yang ada kat muka, produk ni memang tersangatlah sesuai.
Jangan risau. Produk ni chemical free. So, tiada sebarang kesan sampingan. 
Ni produk nye:
Saturday, March 5, 2011

18. Percubaan

"Pada malam ini saya ingin mengambil kesempatan untuk mengumumkan kuliah Fardhu Ain kita pada hari Sabtu ini ditunda kepada hari Isnin," kata Pak Jabit.

Ahhh! Dah2 laa dengan Kak Limah tu! Bakor kang! Actually, aku nak cerita sikit ni.

"Cer cite, cer cite,"

Hasil kedua guna PenTool kat Photoshop. Dalam sibuk2 buat assignment pun, sempat gak aku menyelit main2 Photoshop ni ye. Jom tengok! Tadaaa

Wednesday, January 19, 2011

8. Header utk KW


Header utk Cikgu Shafawati aka Kak Wae.
Teman sekampung, satu sekolah.
Erk, entahla la lawa ke tak.
Huhu~
Pssst~ Kak Wae, kalu tak lawa, gitao ye. Hehe~
Spesel utk Kak Wae ni..Kikiki :)

Blog beliau best! Jom terjah!

:D

Thursday, January 13, 2011

4. Header Baru Lagi

Yay! Header baru! (Lagi?). Masuk kali ni dah berapa puluh ribu kali aku tukar header. Header yang ni aku taktau bertahan sampai bila. Entah2 esok tukar lain pulok :D

Kenapa aku suka tukar header?

Thursday, February 25, 2010

[Tutorial] Perfect Skin Solution

My 1st tutorial ^_^

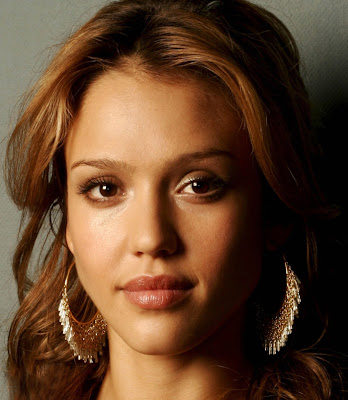
1) Open image. Mine from stylin291@flickr


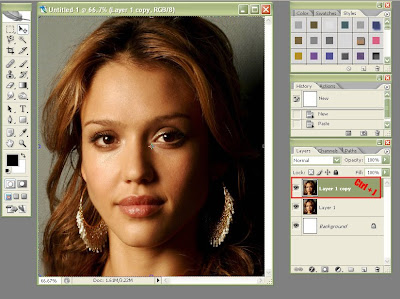
2) Duplicate layer or tekan Ctrl+J. You'll have 2 layers now.
-We will use the duplicated layer for the next steps-


3) Then click Filter->Noise->Dust & Scratches. Set Threshold 0, and Radius for this image is less than 9. You can still adjust with your own preference ^_^. Click OK.

4) Next, click Filter->Blur->Gaussian Blur, and choose something between 2-5 (or secukup rasa - AGAIN ^_^). Satisfied? Click OK


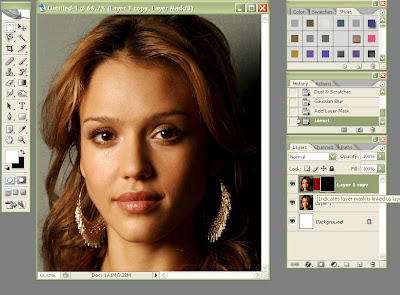
5) Then you will turn on layer mask for this image. Go to Layer->Layer Mask->Reveal All.


6) Click Ctrl+I to Inverse. Click at the mask-icon (next to layer-thumbnail @ the highlighted one). You can see that the blurring is now gone. (It's masked actually, not really gone..telah d'topengkan..lolx)


7) Finally, take small size Brush tool. Choose the color white (kalau mask korang putih, choose black). Start painting all over the face (ingat, jgn kena mata @ hidung @ mulut. Just skin - mcm nk guna ubat sapu..lolx.).

The blurred layer will now become visible over the part you paint.


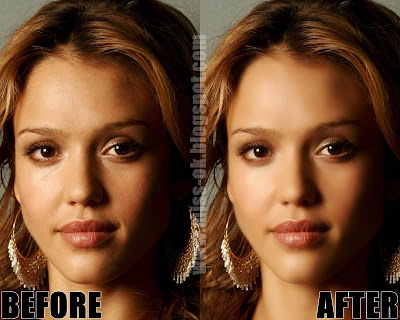
Final Result:


p/s: Jessica Alba mmg super cun ah (^o=)


♥Interesting Post by Others♥